Install Adguard Home on a Raspberry Pi 4 and enable remote access with Tailscale
 Raspberry Pi, Adguard Home, and Tailscale logos
Table of Contents
Finding a project
A few weeks ago, I decided to finally order the different cables I needed to use the Raspberry Pi 4 my partner gifted me right before the pandemic. I’m not sure why I didn’t do it right away but ultimately I felt like it wasn’t the right time back then while we all had to deal with a lot of uncertainty. I remembered the new version of the Pi suffered from heat issues (that later got partially fixed by a software update) when it came out so I also ordered a fanless cooling case (the Armor Case Passive Cooling) along with the SD Card, power adapter, HDMI, and Ethernet cable.
Setting up the Raspberry Pi was super easy as the Raspbian OS was already pre-installed on the SD Card so the first real challenge was to find a project. If you had gifted me this 10 years ago, I would have built a Teamspeak or Mumble server so my friends and I could talk while playing Counter Strike : Source but today, in 2022, I wanted to build something that could have an impact on my daily life. The answer was simple: blocking ads and trackers!
On the Raspberry Pi, Pi-Hole and AdGuard Home are the most popular ad-blocking projects. After comparing the two, I decided to use AdGuard Home because of its stability, modern look and list of features.
Install Adguard Home
To install Adguard Home on your Raspberry Pi, you have three options:
- Automated install (by running one command in your terminal)
- Docker (to have the entire application and its dependencies in one container that is easy to deploy and maintain)
- Snap Store (a graphical desktop application for discovering, installing and managing applications on Linux)
I first tried the Docker option by using the official Docker image. I managed to install it without any issues and run the admin dashboard but that was about it. When I tried to set up my clients, I couldn’t manage to make them talk with the Raspberry Pi. I believe the issue was around the macvlan driver that you need to create as AgGuard Home is an application “which monitor network traffic and expect to be directly connected to the physical network” but I couldn’t find a solution.
I decided to forget about Docker and just use the automated install script which is way easier. To use it, you first need to update your system by running the following commands:
sudo apt update
sudo apt full-upgrade
sudo reboot
Then, run the following curl command to start the automated install script.
curl -s -S -L https://raw.githubusercontent.com/AdguardTeam/AdGuardHome/master/scripts/install.sh | sh -s -- -v
The installation only takes a few seconds and in the last few lines of the script, you’ll see the private IP addresses on which you can access the AdGuard Home admin dashboard.
- 127.0.0.1 is the localhost or loopback address in the IPV4 format. It’s like an alias IP address that is used only by the computer you’re on.
- ::1 is also the loopback address (i.e. localhost) but in the IPV6 format.
- 192.168.0.10 is the private address of my Raspberry Pi.
AdGuard Home is successfully installed and will automatically start on boot.
There are a few more things that must be configured before you can use it.
Click on the link below and follow the Installation Wizard steps to finish setup.
AdGuard Home is now available at the following addresses:
2022/05/19 12:01:29 [info] Go to http://127.0.0.1:3000
2022/05/19 12:01:29 [info] Go to http://[::1]:3000
2022/05/19 12:01:29 [info] Go to http://192.168.0.10:3000
2022/05/19 12:01:29 [info] service: action install has been done successfully on unix-systemv
AdGuard Home is now installed and running
you can control the service status with the following commands:
sudo /opt/AdGuardHome/AdGuardHome -s start|stop|restart|status|install|uninstall
Click on the one you prefer and a new page will open on your browser to start configuring AdGuard Home. You’ll have to create a username and a password and then AdGuard will show you a page explaining what you need to do to configure your clients (smartphone, laptop, smart TV, etc) so they can use the Raspberry Pi and AGH as their DNS server.
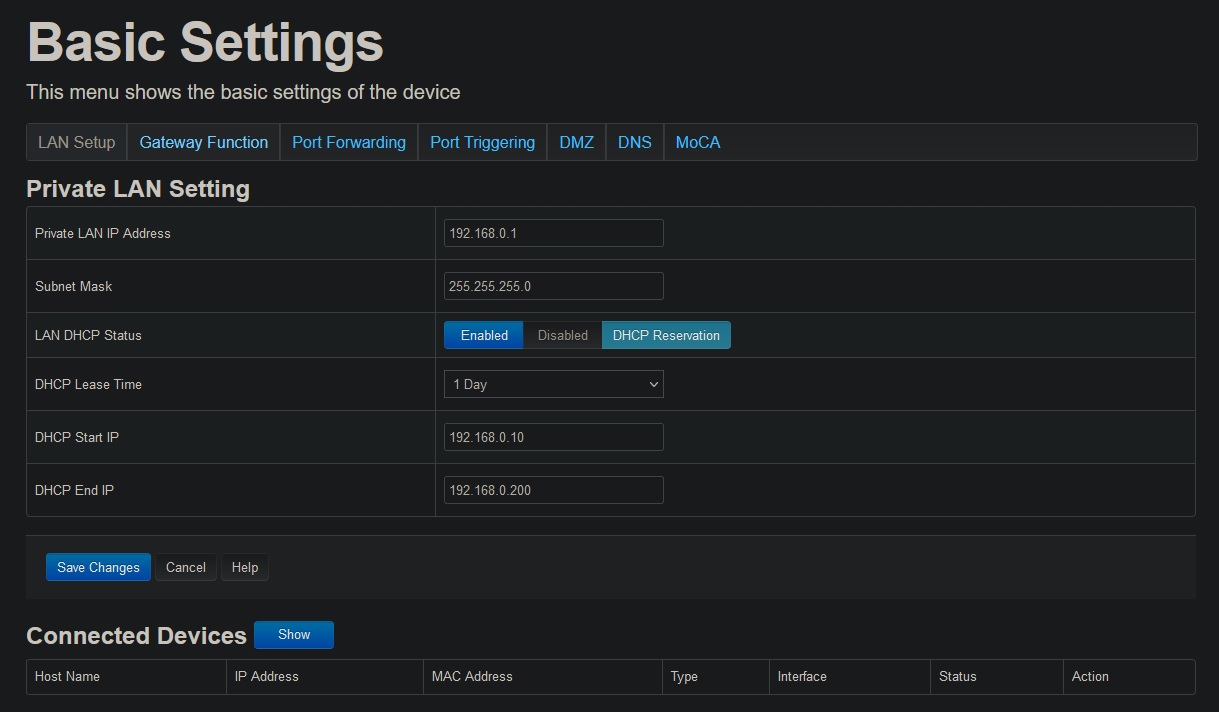
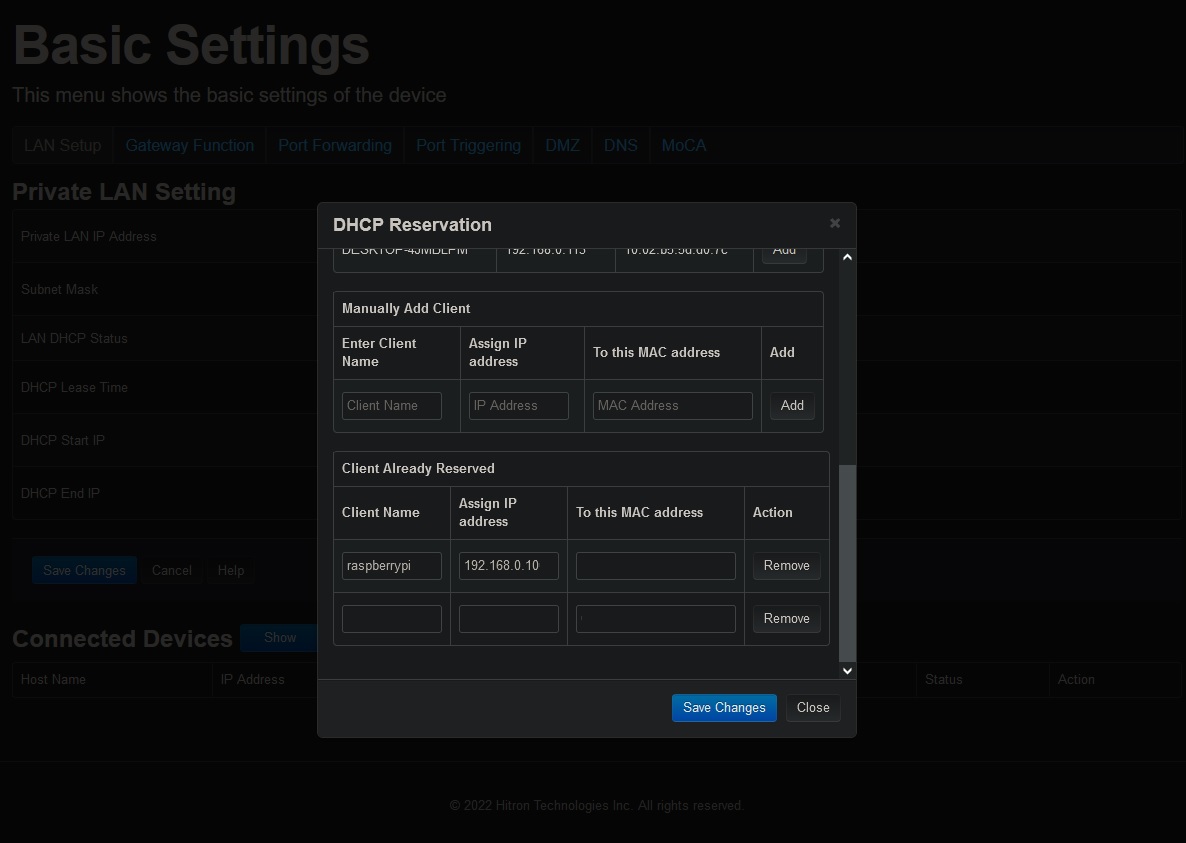
Before doing that, you need to make sure that the IP address your router assigned to your Raspberry Pi will not change. My Raspberry Pi is connected to my router with an ethernet cable but I know that my router has DHCP (Dynamic Host Configuration Protocol) enabled. Whenever I connect a new device to the WiFi or via an ethernet cable, my router will assign to that device an IP address from a specific range. To avoid getting a new IP any time you reconnect your Raspberry Pi to the network, you’ll need to assign it a specific IP address.
To do that, go to the admin page of your router (mine is 192.168.0.1) and head over to the page/section about Private LAN Setting or DHCP Reservation and assign an IP address to your Raspberry Pi. The AdGuard script told me my Raspberry Pi private IP address was 192.168.0.10 so I assigned it this one permanently.
Now it’s time to configure your devices by following the steps laid out by AdGuard. On my Android phone, the DNS changes were being overriden by Android so I had to download an app called DnsChanger to make sure Android would use my Raspberri Pi as its DNS server and not the default one set by Google. If you’re planning to enable remote access with Tailscale, you won’t need to install this app.
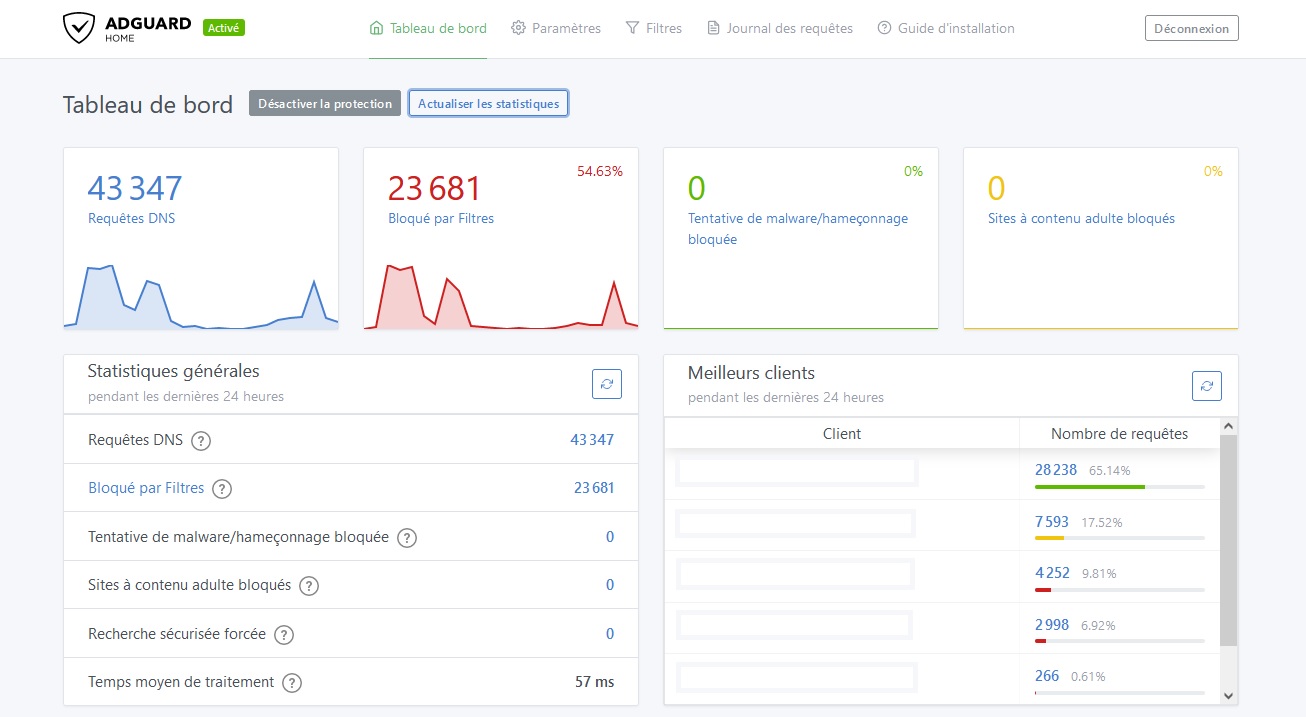
Once you’re done, you should see some activity on the AdGuard dashboard.
Enable remote access with Tailscale
You’re now blocking ads and trackers at the network level on your home network which is awesome but what if you want to use your Raspberry Pi with AgGuard Home as your DNS server on your smartphone when you’re not home? Or access the dashboard from your laptop while you’re away on a business trip?
There are multiple ways to do this. The first option is to set up port forwarding for each service but it can pose a security risk as your home network will now be exposed to the open internet. The second and easiest way to provide a full secure access to your local network is to use a VPN that will encapsulate your traffic in an encrypted tunnel to access your local network.
Wireguard is a great tool to do exactly that but setting it up and configuring it isn’t as easy as using Tailscale. Tailscale is relatively new (founded in 2019 in Toronto, Ontario) and it’s really easy to install and set up and it’s based on the Wireguard protocol. A few clicks and you’re done. I was actually shocked at how easy and fast it was to set everything up.
On your Raspberry Pi, run the following command to install it:
curl -fsSL https://tailscale.com/install.sh | sh
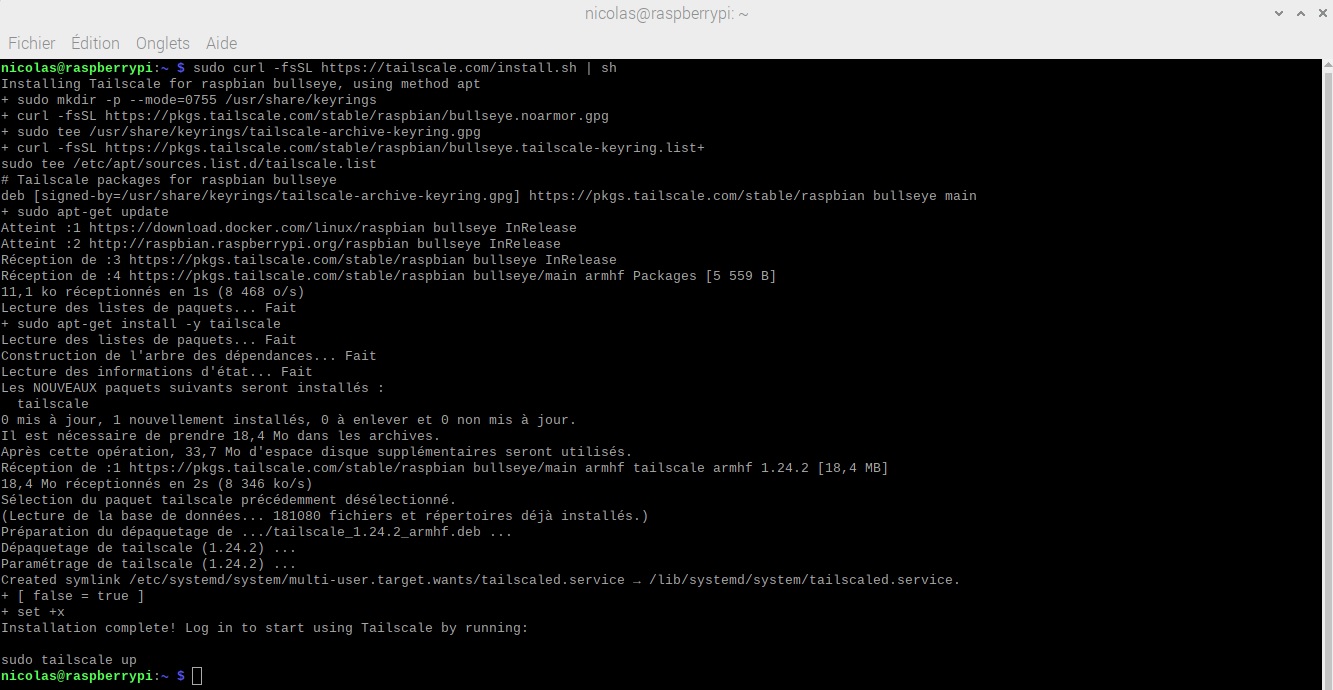
Then, run the following command to start Tailscale
tailscale up --accept-dns=false
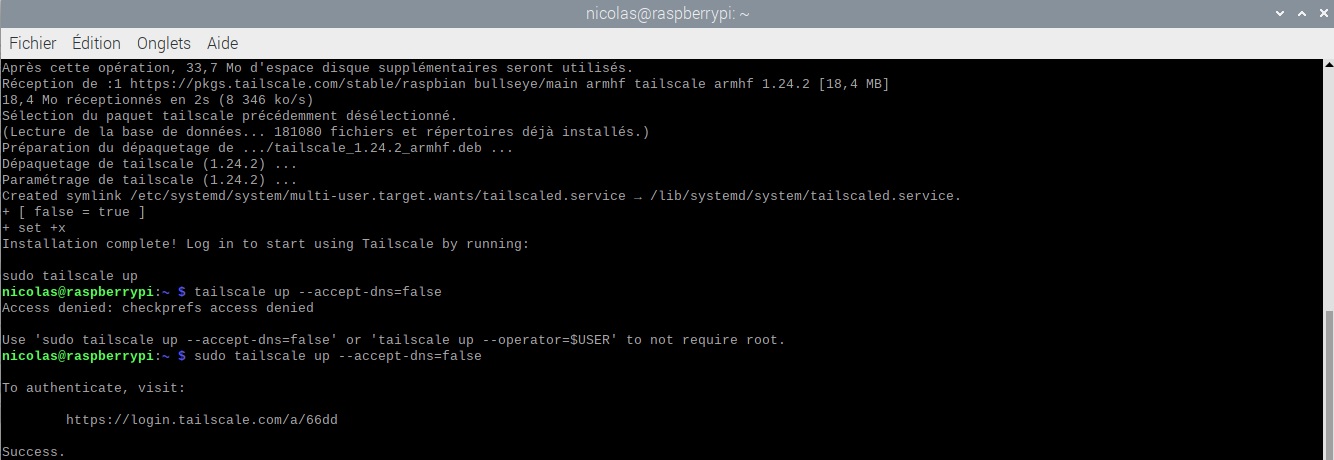
You’ll need to authenticate by clicking on the URL and then using your Google, Microsoft, or Github account. You can’t register with an email address. You’ll now see your Raspberry Pi on the Tailscale dashboard with its public IP address.
Next, install Tailscale on your smartphone, laptop, or both. The limit for the Free plan is 20 devices. On my end, I installed the Tailscale app on my phone and then enabled the VPN service by clicking on the toggle on the top left corner.
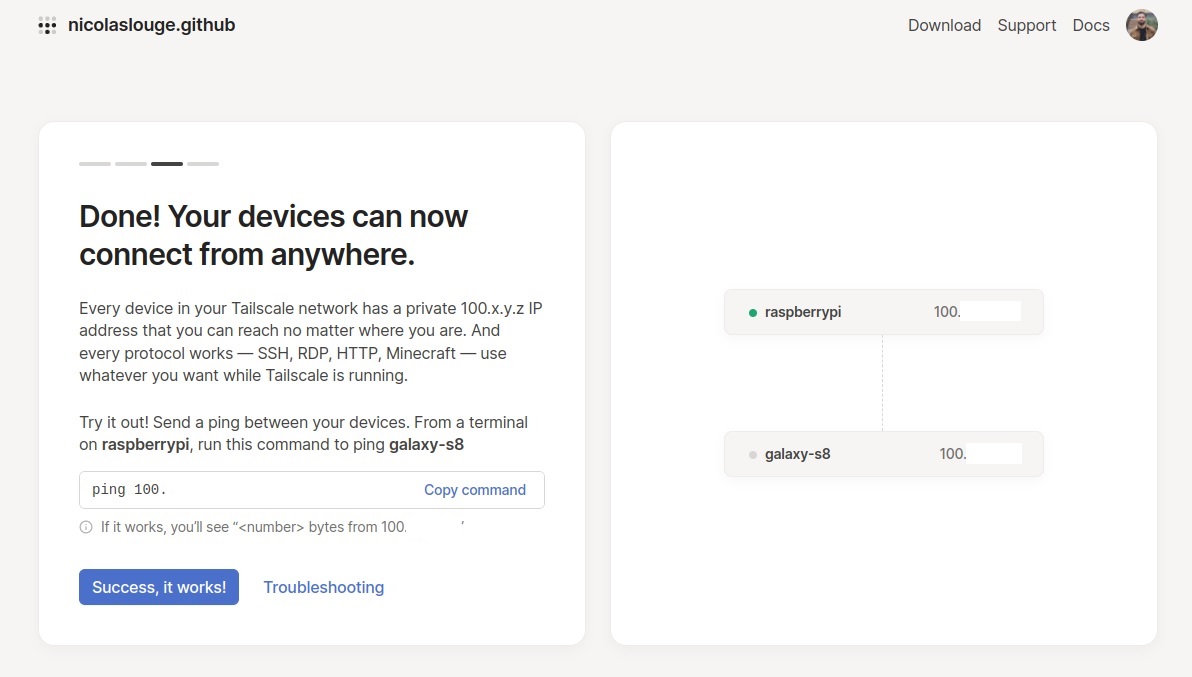
The next and final step is to say to Tailscale that you’ll use a custom IP for the DNS server that all your devices on the Tailscale network will use. On the Tailscale dashboard, click on the DNS tab then on Add nameserver and finally on Custom.... Enter the IP address of your Raspberry PI, click Save and toggle the Override local DNS.
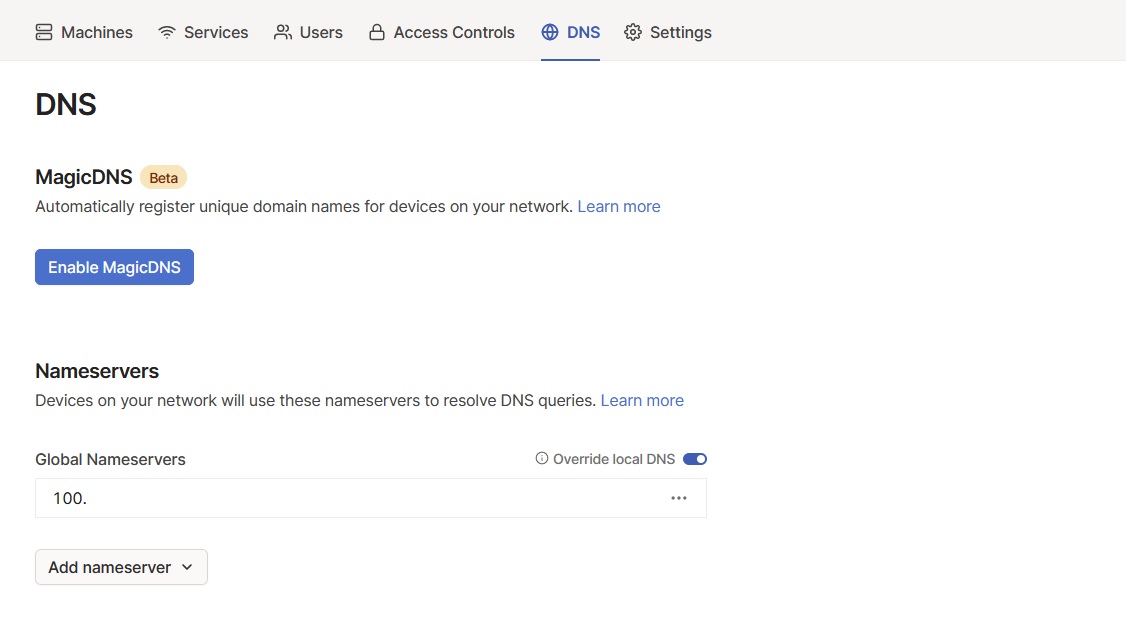
Your device will now use your Raspberry Pi as a DNS server and you’ll be protected by AdGuard Home. You can also access your AdGuard Home dashboard remotely by typing the public IP address of your Raspberry Pi in your browser.