How to create a static website with Hugo, Netlify and Wowchemy (2022)
 Hugo, Netlify, and Wowchemy logos
Table of Contents
- Introduction
- What’s what
- Where do I start?
- Set up your development environment
- Deploy the Academic theme
- Make it yours
- Update
- Resources
Introduction
If you want to create a website or a blog using a static site generator (SSG), there are a lot of different guides about this subject on the internet. Some are recent, some are older, but a lot of them are not really detailed to start from scratch. For the most part, they are easy to follow along but they’re going straight to the point fast, sometimes too fast. If you’re like me, you might always end up having more questions about the tools and the logic behind it all than before you started reading up on it.
This is why I’ve created this “ultimate guide” on how to set up a website from scratch with Hugo, Netlify, and Wowchemy. I hope it will help you get a better understanding of the entire process and of the technologies being used.
Let’s dive in!
What’s what?
What’s a static website?
Modern websites are separated in two types: static and dynamic.
Static websites are made up of HTML pages that load the same way every time for every visitors. There is no database queries and no PHP processing. The code hosted on your web server is the same code the browser will see when requesting to load your website.
Dynamic websites are rendering the webpage at the time of the request. The code the browser will see when requesting to load the site will be one that has been generated on the fly by the web server. They are more powerful but also more complex and expensive to set up, run, and maintain.
What’s a static site generator?
To close the gap between static and dynamic websites, static site generators (SSGs) have stepped in. These tools create HTML pages with HTML templates, text files (Markdown), and configuration files. The difference is, the process happens only once during the build stage instead of every time someone is requesting to see your website.
Hugo is a static site generator written in Go that was originally created by Steve Francia in 2013. 1 In 2015, it started to quickly gained a lot of popularity along other SSG like Jekyll.
In 2016, Matt Biilmann and Chris Bach (the co-founders of Netlify) came up with the name “JAMstack” 2 to “better define what developers were already starting to do which was to “decouple the front- and back-end of web and apps, focus on best practices of speed and availability, and redefine their workflows”. 3
What’s the Jamstack?
Originally, JAM stood for JavaScript, API & Markup and stack for all the technologies used.
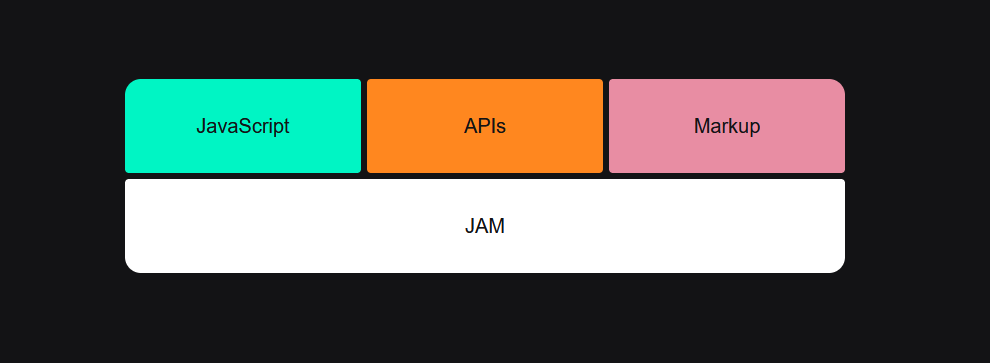
In 2020, “JAMstack” became “Jamstack” and the name is now used to broadly refer to an architectural approach for building websites that are decoupled (where the front end is built from a static site generator while the back end is often integrated with the front), static first, and progressively enhanced.
Jamstack sites are:
- Fast
- Secure
- Less expensive
- Scalable
If you want to read more about Jamstack and its history, go to Jamstack.wtf.
Where do I start?
For starters, you need to choose the static site generator tool you’ll use to create and build your website. There are more than 300 generators to choose from and new ones are seeing the light almost every day. You can see the full list on the Jamstack website. The top 3 are: Next.js, Hugo, and Gatsby.
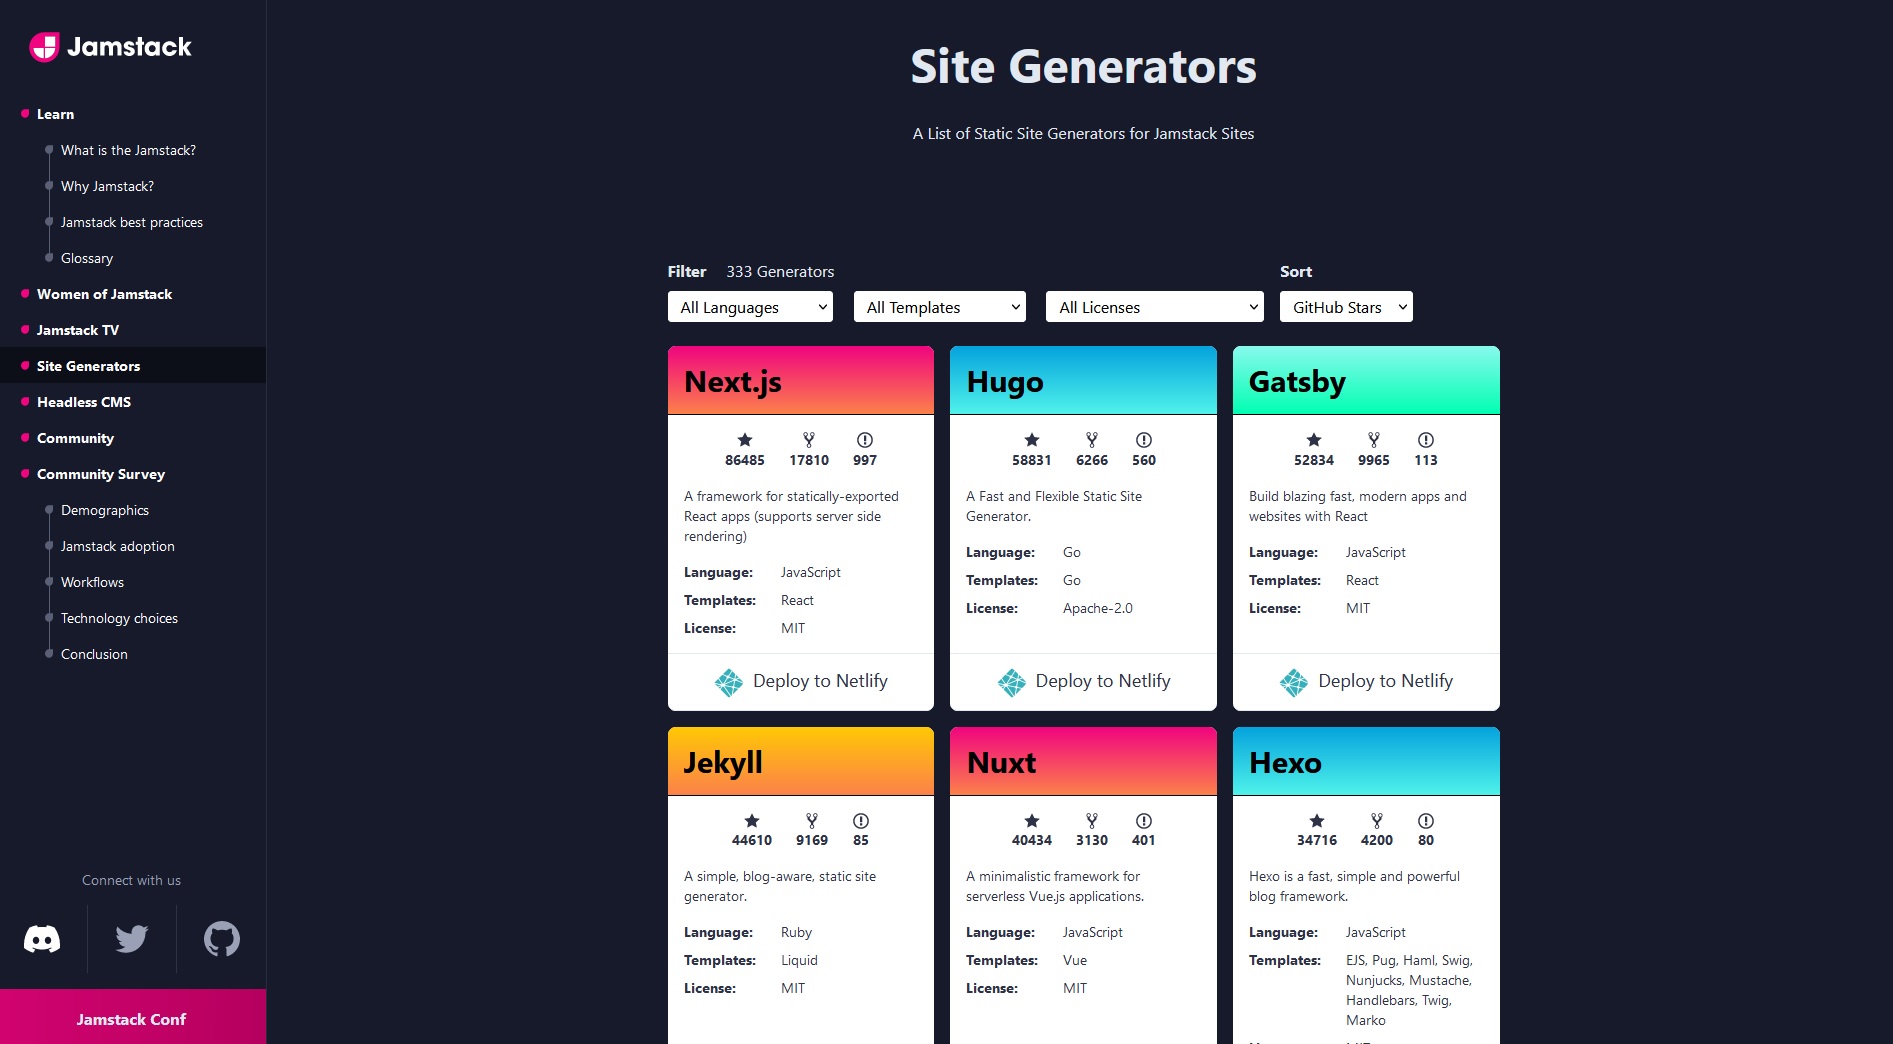
For this guide, we’ll use Hugo with the Academic-resume theme from Wowchemy.
Set up your development environment
The first step is to set up your local development environment. I’m on the latest Windows 10 build and the following section will detail how to install the software we need on this operating system only. If you’re on macOS or Linux, feel free to adapt the next steps and find alternatives that are available on your OS.
- Windows Terminal
The first tool we’ll download is the new Windows Terminal. It’s open-source, modern, and it has a lot of settings and configuration options. We’ll need to use it to launch specific commands to run your Hugo website locally. To install it, go to the Microsoft Store and install it from there. This method allows you to always be on the latest version when Microsoft releases new builds.
- Hugo
Hugo, the static website generator we’ll use for this project, is available on multiple platforms (macOS, Windows, Linux) and in different versions.
Why do we need to install it locally? To build (generate the files of) our website and see the changes instantly without having to push the code on the internet.
To install it on Windows, follow the detailed guide on the Hugo website and make sure you’re installing the extended version (when I first installed it back in November 2021, the latest version was “hugo_extended_0.89.4_Windows-64bit.zip”).
Why do we need to use the extended version? Because the Hugo theme we’ll be using processes SCSS to CSS for the look and feel of the website and the Hugo documentation says the extended version is needed for that.
Once it’s installed, reboot your machine. If you need to see if it’s installed correctly, launch Windows PowerShell in the Windows Terminal and type:
hugo help
You should see the following output:
hugo is the main command, used to build your Hugo site.

Hugo is a Fast and Flexible Static Site Generator
built with love by spf13 and friends in Go.

Complete documentation is available at http://gohugo.io/.
- Go & Git
To run correctly, Hugo needs to have two other tools installed. The first one is the Go compiler toolchain (as Hugo is written in Go) and the second one is Git (a free and open source distributed version control system that will help you manage and track all the changes made on your code).
To install Go, go to go.dev and download and install the binary for Microsoft Windows in the “Featured downloads” section. To verify that you’ve correctly installed Go, open the Windows Terminal and type:
go version
If it’s installed, you should see a similar output:
go version go1.17.3 windows/amd64
To install Git, go to git-sm.com and download and install the latest release for Windows. To make sure that you’ve installed git, open the Windows Terminal and type:
git version
If it’s installed correctly, you should see a similar output:
git version 2.33.1.windows.1
- Visual Studio Code
To edit the files of your website you need a text editor and one of the best on Windows, if not the best at the moment, is Visual Studio Code.
To install Visual Studio Code, go to code.visualstudio.com and click on the blue button that says “Download for Windows”.
Once installed, you now have everything you need to create and run your Hugo static website locally on your machine. To push it live on the internet, you’ll need to create an account on two websites. The first one is Github and the second one is Netlify.
- Github
Github is a website where developers can store their projects on public or private locations (called repositories). The site offers the distributed version control and source code management (SCM) functionality of Git, plus its own features.
To create an account, go to Github and click on the sign up button. The name of your account will be the name of your profile (mine is github.com/nicolaslouge).
- Netlify
Netlify is a cloud company founded in 2015 by Matt Biilmann and Chris Bach. They came up a year later with the name “JAMstack”. Their website offer free hosting for static websites (with some limitations) under the “starter” plan.
The Github repository (project) you created for your website will be linked to your Netlify account. It means you’ll be able to store your website code for free on Github and then deploy and host it on Netlify automatically, also for free.
To create an account go to Netlify and click on sign up at the top right of the site. Since you’ve already created a Github account in the above step, you can easily create a Netlify account by using your Github credentials.
Deploy the Academic theme
Now that you’re all set up, we’ll deploy the Academic theme template on our Github/Netlify environment. On the Wowchemy website, click on Get Started on then on Start with Academic Resume.
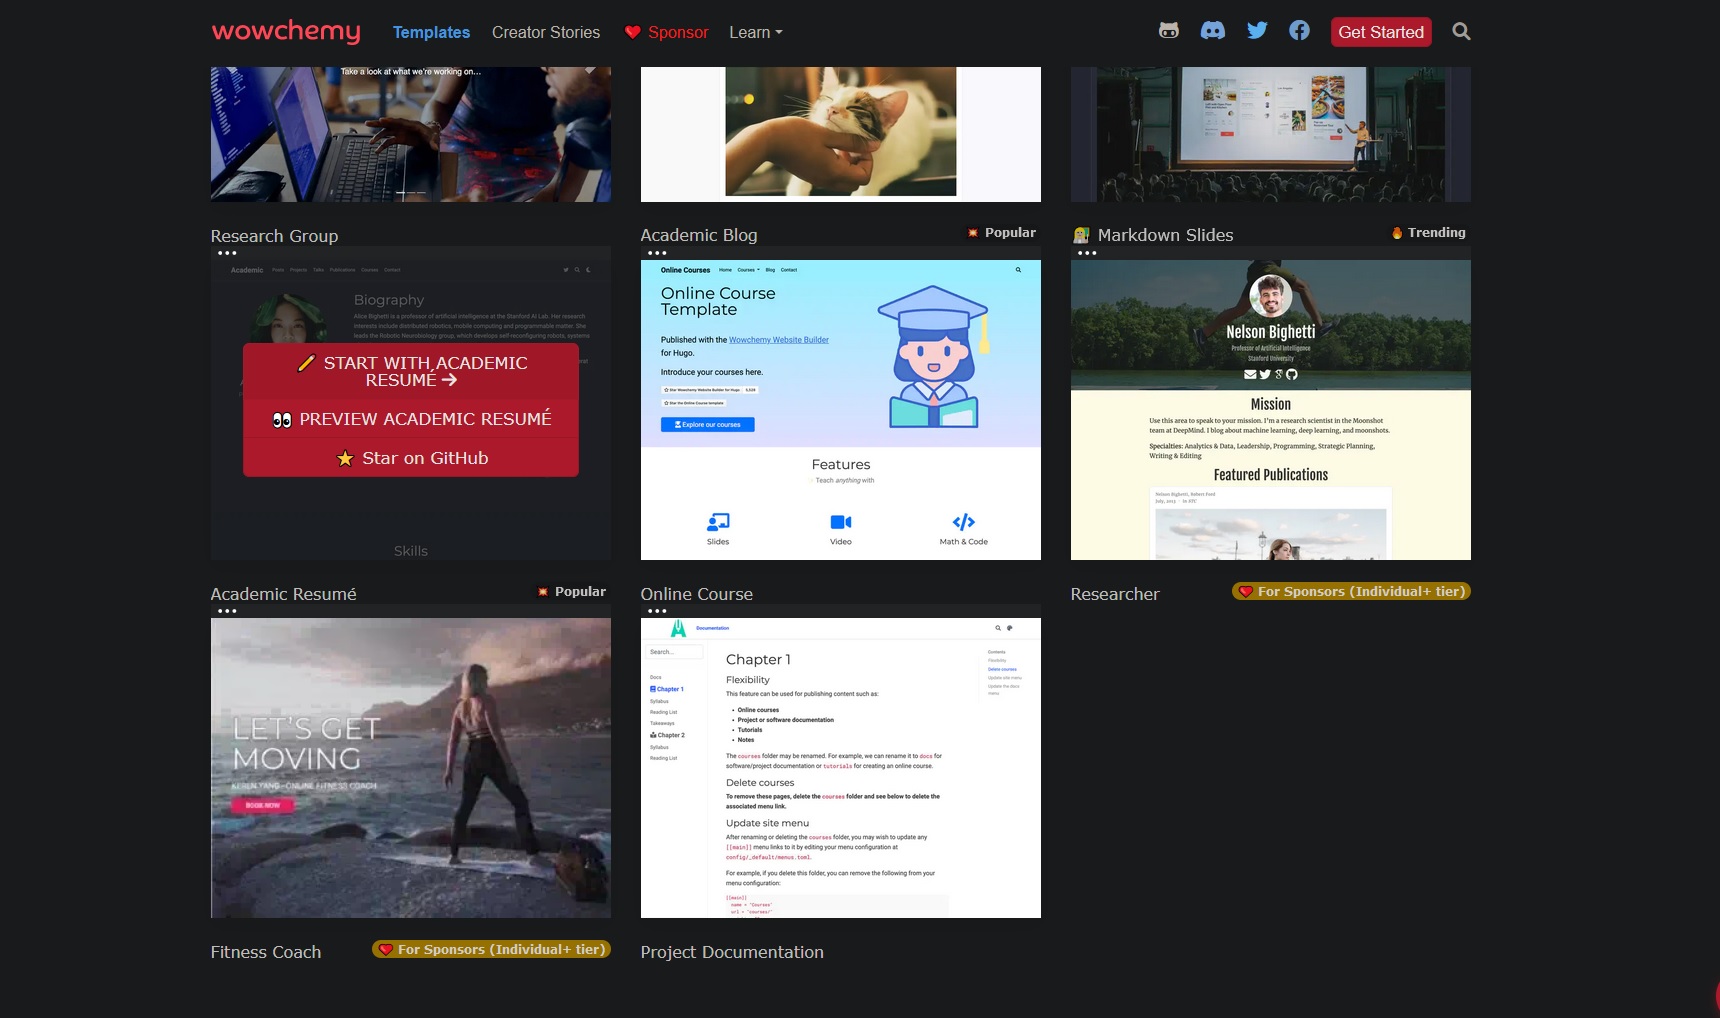
A Netlify page will open up asking you to connect to Github and then to give a name to the new repository that Github will create for you. Mine is named “nicolaslougecom” but you can name it anything you’d like. For this demo, I’ll use hugo-academic-demo. You can then click on Save & Deploy.
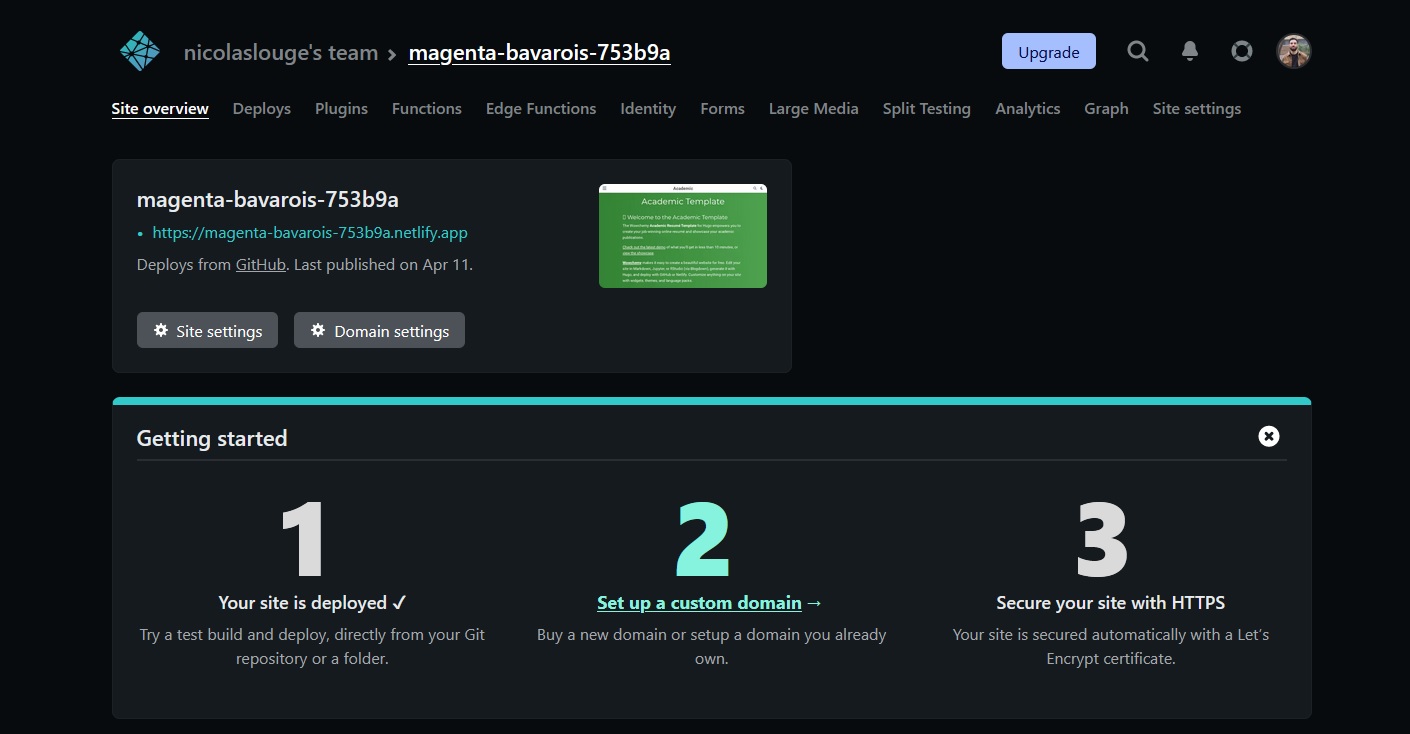
Behind the scenes, Github will clone the starter-hugo-academic repository on your account under the name you chose and Netlify will create a new project/site that is linked to your repository and will give you a public URL which means your website is already live on the internet! Anytime, you’ll push new code in this repository, Netlify will generate the HTML and CSS files and will host them on their servers.
On your Netlify account, you can see you have a new site. Click on it, and you’ll see the URL Netlify generated for your project under Site overview.
Make it yours
Now that your site is live, it’s time to make it yours and to edit the code. To get the code that is in your Github repository, you need to clone it. To do so, open your file explorer and create a new folder named Github wherever you like but preferably in a location that is easy to access. Then, open Visual Studio Code on your machine, click on Terminal on the top menu bar and then New Terminal and enter the following cd command followed by the path name of where you create your folder. Mine is under Documents so my command will look like this:
cd C:\Users\Nicolas\Documents\Github
Now, go to your Github account, click on your website repository, click on the green Code button and then copy the HTTPS address that Github gives you. Go back to your terminal in Visual Studio code and run the following command with the address you have just copied:
git clone https://github.com/nicolaslouge/hugo-academic-demo.git
The code of your website is now in the Github folder you created on your machine under the name of your website repository. In Visual Studio, click on File, Open Folder, and open your project. This is what you should see:
Now that you have all the files locally, you can run a few commands to start a web server on your machine and see instantly the changes you’ll make without having to push the code on Github. Only you will see the changes and your live website will not change (not until you push the new code).
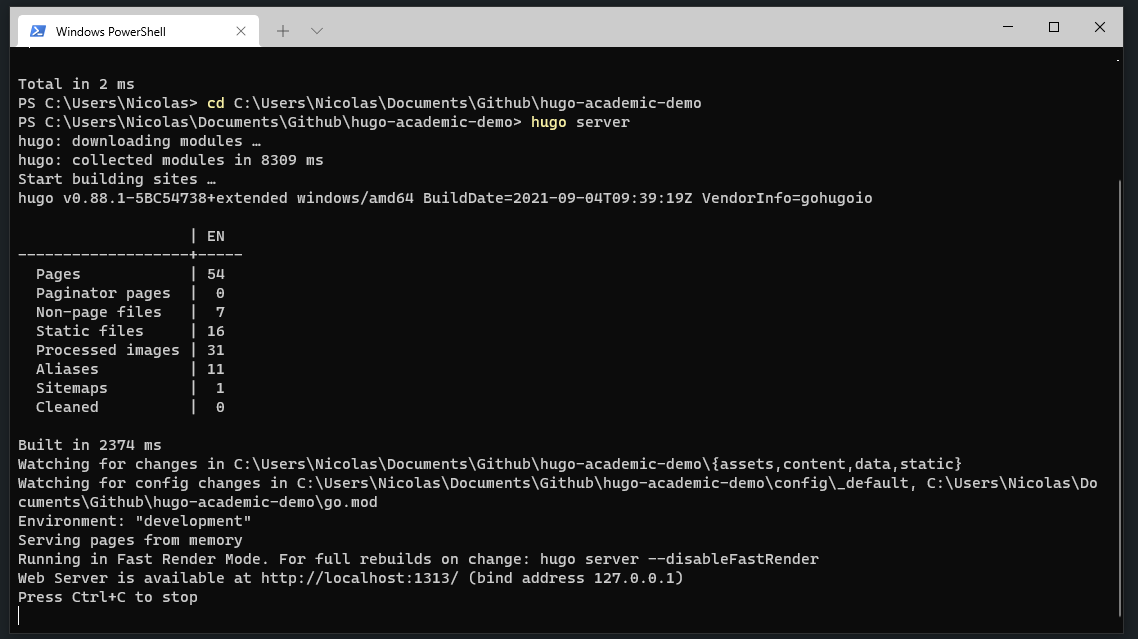
To run the web server, open the Windows Terminal and run the following commands:
cd C:\Users\Nicolas\Documents\Github\hugo-academic-demo
hugo server
Hugo will generate the static files (HTML, CSS) of your websites (which you can find in the Github\hugo-academic-demo\static\uploads folder) and will then start a local web server. You can see in your terminal the address of the local website. Any changes you’ll make will be instantly reflected. For now, the website is the exact same as the one hosted on Netlify.
If you get an error similar to hugo server Error: from config: failed to resolve output format "headers" from site config, go to the %TMP%\hugo_cache\ folder on Windows and delete the modules folder. Then, launch the hugo server command again (see the thread on the Hugo forum).
Alright, this is where it gets more complicated. The Academic theme source code (which is now your website) is divided between multiple folders.
assets (contains your website favicon)
config (contains four configuration files)
content (contains the different modules that are on your website)
data (contains configuration file of the page sharer social icons you can enable/disable)
exampleSite (is an example of a site with some content, you can delete this folder)
images (contains two images)
resources (contains .webp generated version of the theme images to make the site faster)
scripts (contains a script to reset your site)
static (contains the static files generated by Hugo when you run the hugo command)
Not everything you’ll visually see in one section on the website can to be updated in only one file. Take some time to open every file in every folder and skim through the code. Try to understand it but if it doesn’t make sense right away, don’t worry too much about it.
Next, you can read and follow the steps on the Hugo Site Customization and/or follow the how-tos below.
How-to
How to remove the green - demo - section
Go to the content/home/ folder and delete the demo.md file.
How to hide any section
If you want to remove a specific section (like the Skills or Experience one), you can add the following code at the top of the skills.md or experience.md file in the content/home/
# Activate this widget? true/false
active: false
How to edit the top navigation bar
Academic is the site title and can be changed in the config/_default/config.yaml file.
Home, Posts, are the different menu options and can be changed in the config/_default/menu.yaml file.
The search and the theme picker can be enabled/disabled in the config/_default/params.yaml file.
How to update the favicon (site icon)
Add your new .png icon in the assets/media folder and rename it icon.png. You can remove the old one.
How to update the avatar
Add your new avatar in the content/authors/admin folder and rename it avatar.jpg (if your image is a JPG). It should be a square image with the same height/width to get the best result. You can remove the old one.
How to update the name, position, social icons, and biography
You can edit all of those in the _index.md file in the content/authors/admin folder.
How to customize a section
If you want to customize a section, like the biography one and add your Certifications next to your Education, then you’ll have to edit the HTML template Hugo is using when generating your site.
This is done through partials and the ones of your site template can be seen in the wowchemy-hugo-themes repository.
To add the Certifications section on my site, I had to:
- Identify which partial I had to modify by inspecting the source of the
Educationsection on my website and then search in the above repository in which file the code was (it was in theabout.htmlfile). - Create a file named
about.htmlunder thelayouts\partials\widgets\folder and copy/paste the content of theabout.htmlpartial in the wowchemy repository. - Create a ```Certifications```` section
You can see the entire process here.
Warning! Don’t just copy and paste my code as my website is not up to date with the latest version. Use the code that match the theme version of your website. For example, I created my site in November 2021, so I had to find the correct version of the partial file under the file history on Github.
Update
When a new version of the template is released by Wowchemy, you’ll have to update your site. I haven’t done it myself yet, but you can see the process on the Update page on the Wowchemy site.